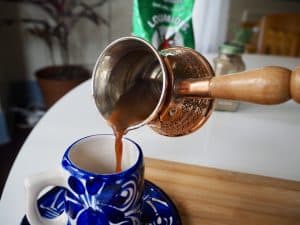
Wednesday, May 15, 2013

The Coffee Collective - Daterra Sweet Collection Review

I have finished my last batch from The Coffee Collective, this third and last one is their Daterra Sweet Collection. 
These were also green when I received them. I roasted them till start of 2nd crack, at about 207c.
Unfortunately all of my pictures from this batch got lost. 
But I can tell the beans are washed and they hold different size. This became a little tricky during the roast. I could see easily that they were roasted uneven. Never the less it became a good batch. 
I like this collection very much, the acidity is extremely low, just when the espresso hits the tip of the tongue, a bright apple acid is noticeable.   
The acid is quickly overtaken by deep and super rich flavors and notes. I have had many problems putting my thoughts of this coffee in to words. 
The flavors are very intense, a heavy mouthfeel with deep notes of bourbon. When after tasting a while, hints of tobacco (in a good way) and malt is shining thru.  The thing that I notice most, is that it's fat. Super fat and rich. It's heavy as well, I only had to fill my portafilter 2/3 compared to normal to get 18 gr.
Because of the fat and richness I don't think it's a good coffee for milk. It just doesn't blend well because of the richness from the milk it self.
As a stand alone espresso with some apple pie, it's just some of the best I could imagine. 
A superb coffee, deep, strong, powerful  and very tasty. But a little tricky to roast.
Enjoy.  

Sunday, May 5, 2013

Home Made Super Jolly Doserless Funnel


So I finally had the finances to upgrade my grinder. For a long time I have been longing for a Mazzer.

At German Ebay I found a very good looking Super Jolly, and I won the auction at a satisfying price compared to many other sites with used goods.
The grinder is a doser model, I decided to make all the doser mods as a start; elvinator, sweeper, inverted cup etc.
But no matter what I did, it seemed to make a big mess, and I really like the convenience of doserless.

I starting looking for at conversation kit, and found some websites with all the parts, but the price were at least 220$ for the kit. That’s way more than I would ever spend on a piece of aluminum !


I searched other coffee forums and came across a link to pictures involving this….


It’s a fudge funnel, and it’s almost the same size as the original Mazzer Mini funnel, just 1 cm bigger in diameter, but that’s not a problem.
A Danish guy already had made the modifications to his major. Inspired by this project, and the fact that the fudge funnel costs 17 euro, I ordered the funnel from Germany. They call it a liqueur funnel.


Cutting and Shredding

First thing is to take of the handle. It’s jointed on with little point weldings. The trick is to get at sharp flat headed screwdriver in between the funnel and the handle. As soon you get a little opening, put the screwdriver to one of the sides and give it a good bash with a hammer. When one welding is cut open, the rest will come easily.


When I took of the doser, I drew the chute and screw holes on to some transparent paper. This way I can easily draw over the places to cut and drill.  
I placed the paper so that, the upper edge of the funnel is 5 mm under the edge of the grinder.


When the holes are drawn to the funnel, use a metal drill. Make sure it’s sharp; otherwise it will melt quickly against the stainless steel. 


 It’s time to make the exit hole against the chute. I used a jigsaw with a metal blade, and it worked just fine with no problems. Before I started cutting, I drilled a 10 mm hole to make room for the blade.


Now it’s time to make the exit hole in the funnel – how big to make it, is a matter of opinion. It took of about 15 mm in the length, but later on I have taken an additional 15 mm because the coffee came to close to the exit and produced a little static. To cut it off I used the jigsaw again, but I would recommend a angle grinder instead, with a thin disc in it.


To finish of I used a fine metal file, to take of all the sharp edges and make a nice finish.

I was able to reuse the gasket from the doser, but after some trial and error taking of the doser several times it broke. I haven’t put in a new one, and I can’t seem to feel a huge difference without the gasket.

Mount the new funnel to the grinder and start shooting. Some grinders need a static grid or another device to slow down the coffee; it usually depends on humidity and types of coffee. Right away I could see I needed one. 


I was also able to use the original lid from the doser, but because the diameter in the funnel is a bit bigger, the lid now goes inside, instead of resting at the edge. I attached some knobs to put under chair legs for the lid to rest on.


I am super happy with the result. It looks just as good, as an original funnel from Mazzer in my opinion. And the quality of the end product is really god as well!


Monday, April 8, 2013

Sidamo and Yirgacheffe from Øristeriet


Øristeriet sent me two samples of fresh coffee – both of them from Ethiopia.


Yirgacheffe, Misty Valley, Adado Coop

Roaster Description: The Adado Coop grows in 2000-2400 meters altitude. It’s a typical Yirgacheffe which makes it floral, light and sweet. One of the absolute best coffees they provide. It is a price winning coffee.  
 
This is a light and very bright coffee - I tried dosing up, but it is best at lower dosage. I used my V60, 12,5 gr. coffee slight coarser than drip and 250 gr. water.
The result is a super fruity and balanced cup. I can taste the lemon very clearly, a long aftertaste of deep chocolate as well. The mouthfeel is creamy and round. I can relate to everything in the description, it's a great coffee to end a lunch with !


     Etiopien Sidamo, Wotona Bultuma Coop - Fairtrade

Roaster Description: A true pleasure, fresh, juicy, mild and soft, light sweetness with clear notes of citrus and dark chocolate. The berries are handpicked to ensure that only fully mature berries are harvested, which results in a superb quality and a higher pay for the farmer.

This is what I would describe as an after dinner coffee. It's really heavy and super rich. I dosed exactly like the yirgacheffe, and played around a bit with the dosage as well. It does well with even higher dosage, but I still ended the same way, that's just where it suited me best.
Notes of honey are clear, combined with bright hints of lemon and apple, the combination is very well balanced. Again the description is spot on.


Both coffees are excellent in their own different way. I drank the yirgacheffe mainly early in the day, and the sidamo in the evening. Both suits well in Aeropress, I also tried it in the frenchpress but I got the best results dripping from the V60.

Once again some super coffee from Øristeriet. I'm amazed by the quality every time.

Sunday, March 24, 2013

Silence your Silvia


Another simple mod for Silvia is to make it a bit more silent ! She does scream a bit the old lady.

It doesn’t take much cash to do this mod, but I do take some time to disassemble the machine.
A lot of material can be used, if its sound or heat proof in any way, it should do. Most I have heard about used floor insulation. It’s a green mat to put under floorboards. It can be bought relatively cheap in the same store you would buy the floor. Just be sure that its non toxic and can hold against the heat.

I have used insulation from a dishwasher; it’s thicker than other materials, and it was free. 

It is very simple; just remove all the plates you would like to soundproof. What is most important is to get insulation around the pump, that’s the noisiest part.

This is what I did:
Remove the top plate and water reservoir.


Remove middle and back plate to expose the pump. 


At this point you can attach your material with double sided tape, to all the disassembled parts. The thicker a layer you get, and the closer you get the joints, the better a result you get in the end. On the back plate there are not much space, my material were too thick, so I just split it with a sharp knife. To finish off I mounted electrician tape around the edge of the top plate, to remove the resonance made when metal vibrates against metal.


Now you can mount material around the pump. I cut different sized pieces to get as much possible in there. I simply closed it in completely.


Now it’s time to put the machine back together. Just bring together the bits in the same order you took it apart. 


Last I mounted more tape to the edge where the grate lays on top, again to remove resonance.


Conclusion
It is a lot less noise now !!

But it is not silent. The noise has come to a much more low frequency humming, instead of the regular metal screaming noise.

I am very happy with the result. I believe it did a big difference.
Enjoy 


Sunday, March 17, 2013

Impod Tampers From Øristeriet


Impod Tampers


I have tested five different tampers from Øristeriet, for the last couple of   Weeks. All five tampers are from the brand Impod. They all look good but vary a lot in price and quality. 
I have tested all of them by the same criteria - how they fit the hand, the weight, how we'll they are processed, looks and of course how well they tamp, and fit the basket. 

The first I tested was also the one in which I had highest expectations. 
A very beautiful wooden handled tamper designed by the Swedish barista Dan Stenqvist. 


Dan Stenqvist
Specs:
Weight     318 gr 
Hight       10 cm
Diameter  57,89 mm
Price        47 $


This is a tamper that looks good in every setup, I love the curves and the wooden look,  which should get darker when it's used. 
It has a small curve at the base. 
It is a pretty high tamper, and it doesn't fit my hand very good. I do have a ridiculous small hobbit hand to be fair, but it just doesn't land well in my hand. 
It is exactly 57,89 mm in diameter, and it fits my Silvia basket very well. The weight is on the lighter side in my opinion; I wouldn't like it lighter than that!
I had a friend with a bigger hand to try it, and he had no problems. So if you have a small hand be aware. Besides that it’s a beautiful and well functional tamper. 


ES 4224 blue
Specs:
Weight    166 gr
Hight       9 cm
Diameter 57, (7/9) uneven
Price       33 $


This tamper is made from aluminum, and is therefore very light, but also a lot cheaper because aluminum is soft and can be processed much faster. 
I think it looks good, I like the bright an shining metal, and the plastic handle looks good even though it’s a cheap tamper. 
As mentioned it is light, way to light. Furthermore its uneven in the base, which is also slight curved, the diameter varies from 57,7 to 57,9 mm. It shows in the brewing to, I had several bad shots in the time I used it. It is meant as a cheap solution instead of the stupid plastic thing that comes with a new machine. I believe it's better to save up and buy proper equipment instead, because you would go bigger at some point anyway. 


    Interrogativo
    Specs:
    Weight    467,8 gr
    Hight       9,4 cm
    Diameter 58,0 mm
    Price       52$ 


Now we're talking.
This is not a tamper with lots of pretty fancy stuff. It's short, it's round, well fitted and it is heavy !! 
Like the others it has I small curve at the base, the base is even and has a hight that, gives me a good impression of my tamp, the lines is easy to look at, and see if it’s even. 
The big "ball" looking thing on the top, gives a good grip. The weight makes the tamp really easy. All shots came out really great. But it's not pretty, and I think esthetics are important, because mainly all of this equipment takes up much space, therefor it should be nice to look at. 


    Esclamativo 
    Specs:
    Weight    395 gr
    Hight       9 cm
    Diameter 57,9 mm
    Price       46,5 $


This one holds many of the qualities I want from a tamper ! 
I think it looks really good. It's very neutral and simple. It's relatively heavy - the base is even, we'll processed and with a small curve. 
The handle has a shape and height suitable for every type of person. 
Every tamp came out great, and I was left with a feeling of super quality. This is the one which stayed beside the machine after the test. Because of the looks, the qualities and the fact that it is versatile. 


    Aluminu
    Specs:
    Weight    240 gr
    Hight       9,3 cm
    Diameter 57,9 mm
    Price       43,5 $


This is a tamper with a handle made of good looking shinny aluminum, and a solid, small curved, stainless steel base. Some of the good things from both worlds. I do like this one very much to, like the Esclamativo it fits my hand well, and the esthetics lives up to what I expect from a tamper. But it still is a little too light weight for me. When a tamper isn't heavy enough, I have to push harder and by that I don't get the consistency I like in my brewing process. Its priced somewhere in the middle and it properly fits very well there too. 


As I said the Esclamativo is the one that I keep in the kitchen for now. It's a great tamper which looks good side by side a stainless machine. 


Luckily tampers are like shoes to me. I like changing it once in a while, making some difference. 


Along with the tampers I got two tamper mats. 
One regular and one with a stainless steel plate, which has one side bend to hold against the counter. 


Tamper mats aren't rocket science. Most things can be used for the purpose, until now I have been using a piece of rubber found in the garage. Others use a cloth, mousepad mat or stands made for the purpose. 
With that said, I actually like the one with steel plate. With the bend edge holding against the counter, I can easily slide the mat and tamper against or away from me. And I do give more stability. The mat costs 26$. 
The regular one costs 10$ so there is a significant difference.